How to Set Up Bitmain Antminer AL1 Pro for ALPH Mining
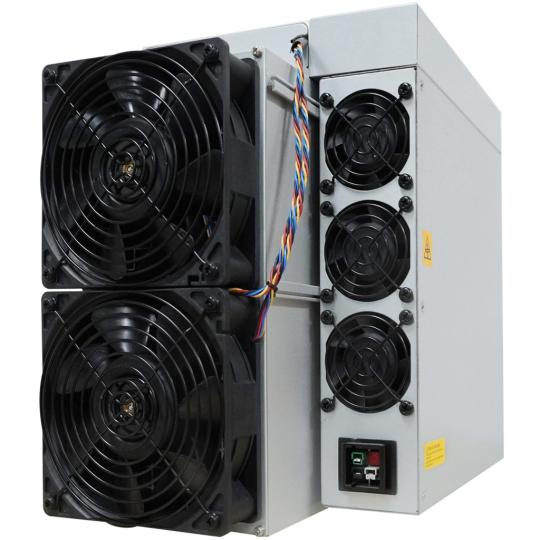
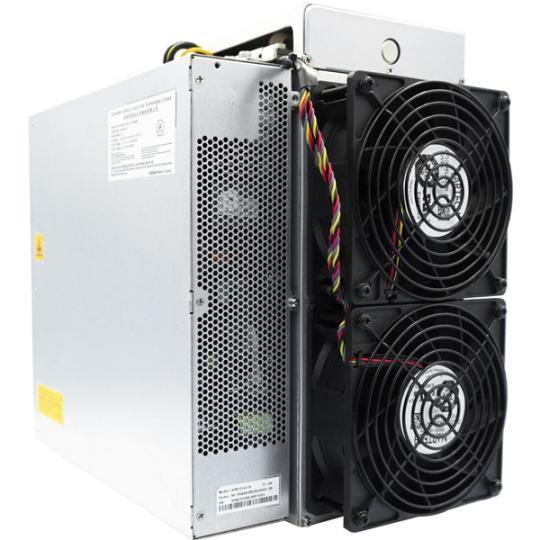
As a cryptocurrency enthusiast, I have been closely following the market trends and advancements in mining hardware. One particular product that has caught my attention is the Bitmain Antminer AL1 Pro ALPH Miner 16.6T. This powerful mining solution is designed specifically for the Blake3 algorithm, which powers the promising ALPH cryptocurrency.
The Antminer AL1 Pro is a top-of-the-line mining rig that offers exceptional performance and efficiency. With a typical hashrate of 16.6 TH/s, it provides a significant computational advantage in the competitive ALPH mining landscape. The miner’s impressive power efficiency of 225 J/TH ensures that users can optimize their energy consumption while maintaining high levels of productivity.
What sets the AL1 Pro apart is its pedigree. As a product of the renowned Antminer brand, the miner is known for its reliability and quality. Bitmain, the manufacturer, has a reputation for producing high-performance and durable mining hardware that can withstand the rigors of continuous operation.
In this article, I will guide you through the process of setting up the Bitmain Antminer AL1 Pro for ALPH mining. Whether you’re a seasoned miner or new to the game, this comprehensive guide will provide you with the necessary information to get your AL1 Pro up and running, maximizing your returns in the ALPH mining ecosystem.
Unpacking and Preparing the Antminer AL1 Pro
The first step in setting up your Antminer AL1 Pro is to carefully unpack the miner and ensure that all the necessary components are present. The package should include the following items:
1. Antminer AL1 Pro unit
2. Power cable
3. Ethernet cable
4. Quick Start Guide
Before proceeding with the setup, take a moment to inspect the miner for any visible damage or defects. If everything appears to be in order, you’re ready to move on to the next step.
Connecting the Antminer AL1 Pro
1. Power Connection:
– Locate the power port on the back of the Antminer AL1 Pro.
– Plug in the power cable and connect it to a reliable power source, ensuring that the input voltage range of 220~277 Volts and the frequency range of 50~60 Hz are within the miner’s specifications.
2. Network Connection:
– Connect the Ethernet cable to the LAN port on the back of the Antminer AL1 Pro.
– Plug the other end of the Ethernet cable into your router or network switch to establish a stable internet connection.
3. Cooling Considerations:
– The Antminer AL1 Pro is designed to operate within a wide temperature range of -20°C to 40°C.
– However, it’s recommended to place the miner in a well-ventilated area to ensure optimal cooling and prevent overheating.
– Avoid placing the miner in direct sunlight or near any heat-generating sources.
Configuring the Antminer AL1 Pro
1. Accessing the Miner’s Web Interface:
– Locate the IP address of your Antminer AL1 Pro on your network.
– Open a web browser and enter the IP address in the address bar to access the miner’s web interface.
2. Miner Activation:
– Once you’ve accessed the web interface, you’ll need to activate the Antminer AL1 Pro.
– Follow the on-screen instructions to complete the activation process, which may involve entering an activation code or completing a firmware update.
3. Pool Configuration:
– The Antminer AL1 Pro is designed to work seamlessly with various mining pools.
– In the web interface, navigate to the “Pool” section and enter the details of the ALPH mining pool you wish to use.
– This typically includes the pool’s URL, your mining account credentials, and any other necessary information.
4. Monitoring and Adjustments:
– The Antminer AL1 Pro’s web interface provides a comprehensive dashboard that allows you to monitor the miner’s performance in real-time.
– Keep a close eye on metrics such as hashrate, temperature, and power consumption to ensure the miner is operating within optimal parameters.
– If necessary, you can adjust various settings, such as fan speed or overclocking, to fine-tune the miner’s performance.
Joining the ALPH Mining Community
Once your Antminer AL1 Pro is set up and configured, it’s time to join the ALPH mining community and start contributing to the network.
1. ALPH Mining Pool Selection:
– Research and select a reputable ALPH mining pool that aligns with your mining goals and preferences.
– Factors to consider include the pool’s fee structure, payout methods, and overall reputation within the community.
2. ALPH Wallet Setup:
– Create a secure ALPH cryptocurrency wallet to receive your mining rewards.
– There are various wallet options, including hardware wallets, software wallets, and online wallets. Choose the one that best suits your security and accessibility needs.
3. Monitoring and Optimization:
– Regularly monitor your Antminer AL1 Pro’s performance and the ALPH mining pool’s statistics.
– Analyze your hashrate, power consumption, and payouts to ensure you’re maximizing your mining efficiency and profitability.
– If necessary, make adjustments to your miner’s settings or consider upgrading to newer hardware to stay competitive in the ALPH mining landscape.
The Bitmain Antminer AL1 Pro is a powerful and efficient mining solution that can help you capitalize on the potential of the ALPH cryptocurrency. With its exceptional performance, energy efficiency, and robust design, the AL1 Pro is an excellent choice for both experienced and novice miners alike.
By following the steps outlined in this guide, you’ll be able to set up your Antminer AL1 Pro and join the ALPH mining community with confidence. Remember, successful mining requires diligence, optimization, and a willingness to adapt to market changes. Stay informed, stay vigilant, and let the Antminer AL1 Pro be your trusty companion in your ALPH mining journey.
|
Please feel free to contact me to assist you in resolving your issues: E-mail: linda.xinxinsmile@gmail.com WhatsApp/WeChat:+86 15928044684
The services we offer include:
a.New and Used Miners b.Miner Accessories c.Miner Repair Courses d.Global Repair Stations e.Overclocking and Underclocking Services |

|