How to Connect AL BOX II PLUS ALPH Miner to Wi-Fi
Cryptocurrency mining has become increasingly accessible, thanks to compact, efficient, and user-friendly miners like the Goldshell AL BOX II PLUS ALPH miner 1T. Designed for both beginners and seasoned miners, this powerful machine leverages the Blake3 algorithm to mine the promising ALPH cryptocurrency. One of its standout features is its ability to connect to Wi-Fi, enabling seamless remote monitoring and management. In this guide, we’ll walk you through the steps to connect your AL BOX II PLUS ALPH miner to Wi-Fi, ensuring you can maximize its potential with ease.
Why Connect Your AL BOX II PLUS ALPH Miner to Wi-Fi?
Before diving into the setup process, it’s worth understanding the benefits of connecting your miner to Wi-Fi:
- Remote Monitoring and Control: Wi-Fi connectivity allows you to manage your miner from anywhere using the Goldshell app. This is particularly useful for checking performance metrics, adjusting settings, or troubleshooting issues without being physically present.
- Simplified Setup: Wi-Fi eliminates the need for Ethernet cables, reducing clutter and making it easier to place your miner in an optimal location within your home or mining facility.
- Real-Time Updates: Stay informed about your miner’s status, including hashrate, temperature, and power consumption, in real time.
Step-by-Step Guide to Connecting Your AL BOX II PLUS ALPH Miner to Wi-Fi
Step 1: Unbox and Prepare Your Miner
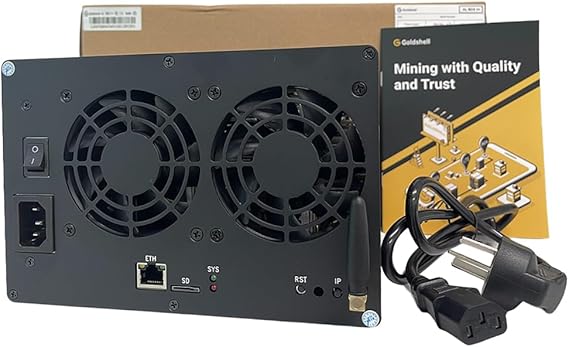
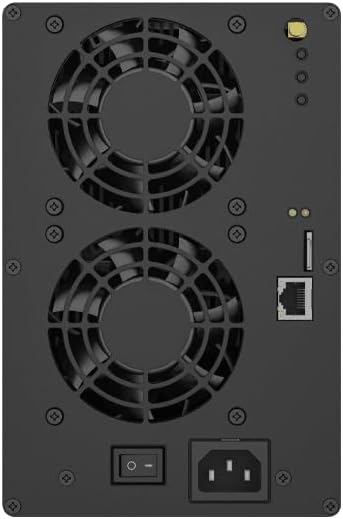
Begin by unboxing your AL BOX II PLUS ALPH miner and ensuring all components are present. The package includes the miner itself, a 10A power cable, and a user manual. Place the miner in a well-ventilated area to ensure proper cooling during operation.
Step 2: Power On the Miner
Connect the power cable to the miner and plug it into a reliable power source. The miner will automatically start up, and you’ll hear the fan begin to spin. Wait for the initialization process to complete, which typically takes a few minutes.
Step 3: Access the Miner’s Interface
To connect your miner to Wi-Fi, you’ll need to access its web interface. Here’s how:
- Connect your computer or smartphone to the same Wi-Fi network you plan to use for the miner.
- Open a web browser and enter the miner’s IP address. You can find this by checking your router’s connected devices list or using a network scanning tool.
- Log in to the miner’s interface using the default credentials (usually “admin” for both username and password).
Step 4: Configure Wi-Fi Settings
Once logged in, navigate to the Network Settings section. Here’s what to do:
- Select the Wi-Fi option from the available connection types.
- Scan for available networks and choose your Wi-Fi network from the list.
- Enter your Wi-Fi password when prompted.
- Save the settings and wait for the miner to establish a connection.
Step 5: Verify the Connection
After saving the settings, the miner will attempt to connect to your Wi-Fi network. You can verify the connection by checking the network status in the miner’s interface or by accessing the miner remotely via the Goldshell app.
Troubleshooting Common Issues
While the process is straightforward, you may encounter some challenges when connecting your miner to Wi-Fi. Here are a few tips to resolve common issues:
- Weak Signal: Ensure the miner is within range of your Wi-Fi router. If the signal is weak, consider using a Wi-Fi extender or relocating the miner closer to the router.
- Incorrect Password: Double-check the Wi-Fi password you entered. Passwords are case-sensitive, so ensure capitalization is correct.
- IP Address Conflict: If the miner fails to connect, check for IP address conflicts on your network. Assigning a static IP to the miner can help resolve this issue.
- Firmware Updates: Ensure your miner’s firmware is up to date. Outdated firmware can cause connectivity issues.
Maximizing the Benefits of Wi-Fi Connectivity
Once your AL BOX II PLUS ALPH miner is connected to Wi-Fi, you can take full advantage of its features:
- Remote Monitoring: Use the Goldshell app to monitor your miner’s performance, including real-time data on hashrate, power consumption, and temperature.
- Alerts and Notifications: Set up alerts to notify you of any issues, such as overheating or connectivity problems.
- Efficient Management: Adjust settings, such as fan speed or power mode, remotely to optimize performance and energy efficiency.
Why Choose the AL BOX II PLUS ALPH Miner?
The Goldshell AL BOX II PLUS ALPH miner stands out in the competitive world of cryptocurrency mining for several reasons:
- Energy Efficiency: With a power consumption of just 480W and an impressive efficiency of 480J/TH, this miner minimizes operational costs while maximizing output.
- Compact and Quiet: Measuring only 133*163*202mm and producing noise levels below 45dB, it’s perfect for home mining setups.
- Beginner-Friendly: Its intuitive interface and straightforward setup make it accessible to newcomers.
- Reliability: Backed by Goldshell’s 180-day warranty and exceptional after-sales support, this miner is built to last.
Conclusion
Connecting your AL BOX II PLUS ALPH miner to Wi-Fi is a simple yet impactful step that enhances your mining experience. By enabling remote monitoring and management, you can stay in control of your operations while maximizing efficiency and convenience. Whether you’re a beginner or an experienced miner, the AL BOX II PLUS ALPH miner offers a powerful, efficient, and user-friendly solution for mining the promising ALPH cryptocurrency.
So, take the leap and connect your miner to Wi-Fi today. With its cutting-edge features and robust performance, the AL BOX II PLUS ALPH miner is your gateway to the exciting world of cryptocurrency mining. Happy mining!