DragonBall Miner A11 Assembly Instructions: A Comprehensive Guide for Cryptocurrency Miners
The cryptocurrency mining landscape is constantly evolving, with new technologies and devices emerging to meet the demands of miners seeking efficiency, profitability, and reliability. Among these innovations, the DragonBall Miner A11 stands out as a game-changer, offering dual-currency dual mining capabilities that allow miners to simultaneously extract RXD and ALPH, two promising cryptocurrencies. However, to unlock the full potential of this advanced miner, proper assembly and setup are crucial. This guide provides detailed, step-by-step instructions for assembling the DragonBall Miner A11, ensuring that even novice miners can get started with confidence.
Introduction to the DragonBall Miner A11
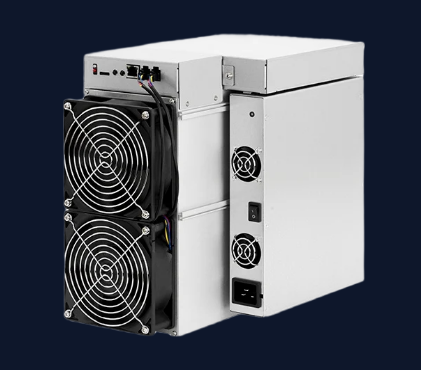
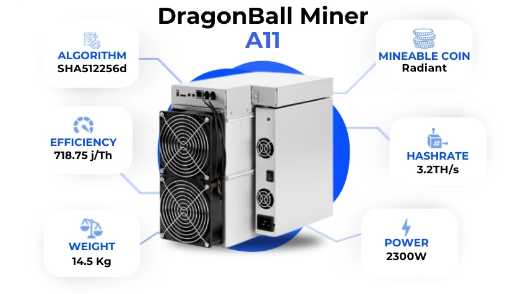
The DragonBall Miner A11 is a state-of-the-art mining device designed to maximize profitability through its unique dual-currency dual mining functionality. By leveraging the SHA512256d and BLAKE3 algorithms, the A11 achieves impressive hashrates of 3T±5% for RXD and 1.1T±5% for ALPH, making it a powerhouse in the mining world. Its advanced cooling system, stable computing power output, and user-friendly design make it an ideal choice for both experienced miners and newcomers.
Backed by DragonBall, a trusted brand in the cryptocurrency mining industry, the A11 combines cutting-edge technology with reliability and ease of maintenance. With a 180-day after-sales warranty and global support through Minerfixes, miners can operate with peace of mind, knowing they have access to spare parts and repair services whenever needed.
Advantages of the DragonBall Miner A11
Before diving into the assembly process, it’s important to understand why the DragonBall Miner A11 is a standout choice:
- Dual-Currency Dual Mining: Simultaneously mine RXD and ALPH, maximizing profits and diversifying your mining portfolio.
- High Performance: Achieve unmatched hashrates of 3T±5% for RXD and 1.1T±5% for ALPH, ensuring competitive mining efficiency.
- Stability and Reliability: Enjoy consistent computing power output and advanced cooling to maintain optimal performance.
- Ease of Maintenance: User-friendly design and readily available spare parts simplify upkeep and minimize downtime.
- Global Support: Access to worldwide repair sites and shipping options ensures seamless operations for miners everywhere.
Step-by-Step Assembly Instructions
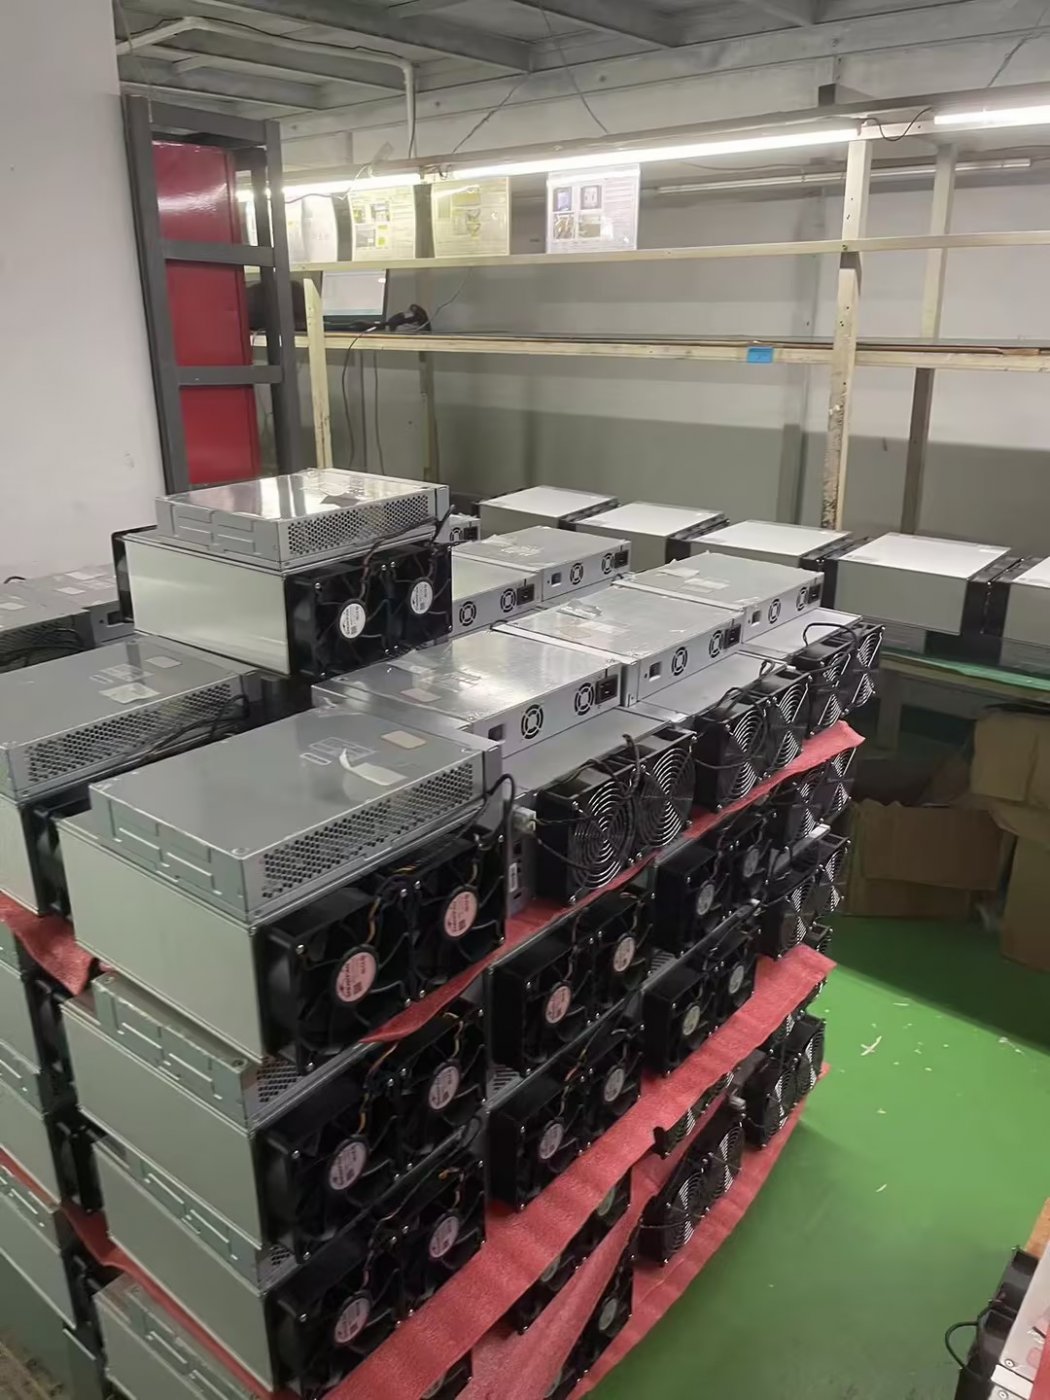
Step 1: Unboxing and Inspection
Begin by carefully unboxing the DragonBall Miner A11. Ensure that all components are included and undamaged. The package should contain:
- The miner unit
- Power supply unit (PSU)
- Cooling fans
- Ethernet cable
- Assembly tools (screws, screwdriver, etc.)
- User manual
Inspect each component for any signs of damage during transit. If any issues are found, contact the seller or DragonBall’s customer support immediately.
Step 2: Preparing the Mining Environment
Before assembling the miner, set up a suitable mining environment:
- Ventilation: Ensure proper airflow to prevent overheating.
- Power Supply: Verify that your PSU meets the miner’s power requirements.
- Internet Connection: A stable Ethernet connection is essential for optimal performance.
Step 3: Installing the Cooling Fans
The DragonBall Miner A11 comes equipped with two high-performance cooling fans to ensure optimal operating temperatures. Follow these steps:
- Locate the fan slots on the miner unit.
- Align the fans with the slots and secure them using the provided screws.
- Connect the fan cables to the designated ports on the miner’s motherboard.
Step 4: Connecting the Power Supply Unit (PSU)
The PSU powers the miner and ensures stable operation. Here’s how to connect it:
- Place the PSU near the miner unit, ensuring the cables can reach without strain.
- Connect the PSU cables to the miner’s power input ports.
- Plug the PSU into a reliable power source.
Step 5: Setting Up the Network Connection
A stable internet connection is crucial for mining operations. To connect the miner:
- Use the provided Ethernet cable to connect the miner to your router or modem.
- Ensure the connection is secure and stable.
Step 6: Configuring the Miner
Once assembled, it’s time to configure the DragonBall Miner A11:
- Power on the miner and access its web interface via your computer or mobile device.
- Enter the miner’s IP address in your browser to access the configuration panel.
- Follow the on-screen instructions to set up your mining pool accounts for RXD and ALPH.
- Input your wallet addresses to ensure mined coins are deposited correctly.
Step 7: Testing and Optimization
After configuration, test the miner to ensure it’s running smoothly:
- Monitor the miner’s performance through the web interface.
- Check the temperature and fan speed to ensure proper cooling.
- Adjust settings as needed to optimize hashrate and efficiency.
Tips for Maximizing Performance
- Regular Maintenance: Clean the miner and fans periodically to prevent dust buildup, which can affect cooling performance.
- Software Updates: Keep the miner’s firmware updated to benefit from the latest features and optimizations.
- Power Management: Ensure your PSU operates within its capacity to avoid overloading and potential damage.
- Monitoring Tools: Use mining software or apps to track performance and receive alerts for any issues.
Conclusion
The DragonBall Miner A11 represents the future of cryptocurrency mining, offering unmatched performance, versatility, and reliability. By following these assembly instructions and best practices, miners can unlock the full potential of this cutting-edge device and maximize their profits.
Whether you’re a seasoned miner or just starting your cryptocurrency journey, the DragonBall Miner A11 provides the tools and support needed to succeed in this competitive industry. With its dual-currency dual mining capabilities, global accessibility, and comprehensive warranty, the A11 is the ultimate choice for miners seeking to stay ahead of the curve.
Embrace the power of the DragonBall Miner A11 and take your mining operations to new heights!